How to Add a Live Chat to a WordPress Website


So you’re looking to add a live chat on your WordPress site?
That’s great! As you may already know, we are big fans of live chats.
After all, customers now prefer to use live chat over other communication mediums and providing good customer support can increase your revenue.
So let’s get into it. Here’s how to add a live chat to a WordPress website, both with and without a plugin.
WordPress.org vs WordPress.com
One thing we do want to get out of the way early is the difference between a wordpress.com and wordpress.org website.
The main difference between both is who hosts and “owns” the code of the website. WordPress.com takes care of all the hosting and management of the site.
As a result, they do not provide you access to the site’s codebase. Therefore you will be unable to edit the code of the site and add custom tools such as a live chat.
On the other hand, with a self-hosted WordPress site (aka Wordpress.org site), you get to choose where to host the codebase and get to edit it to your heart’s desire. This gives you access to custom plugins, tools and more.
This guide refers specifically to WordPress.org websites since WordPress.com sites are not able to use live chat functionalities.
Selecting a Live Chat provider
Your first step in this process will be selecting a live chat provider to add to your site.
Our recommended approach is to first layout your business needs when it comes to a live chat provider. You can then come up with a list of features that you require from said tool.
Obviously, we recommend using Moment, a live chat tool that is also a fully-featured CRM platform. The best part is that Moment has a free plan to get you started right away with live chat support.
Creating a Moment Account and Getting the Code Snippet
Creating a free Moment account is incredibly easy.
Using your email, create an account and name your team. Then, pick the specific features you’d like to add to your website.
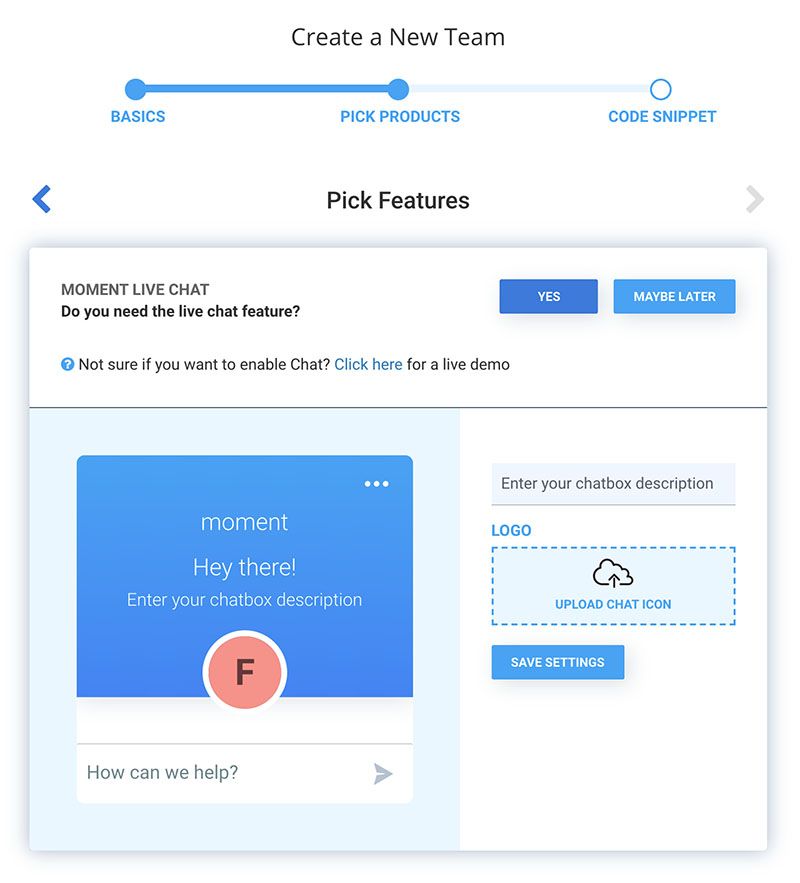
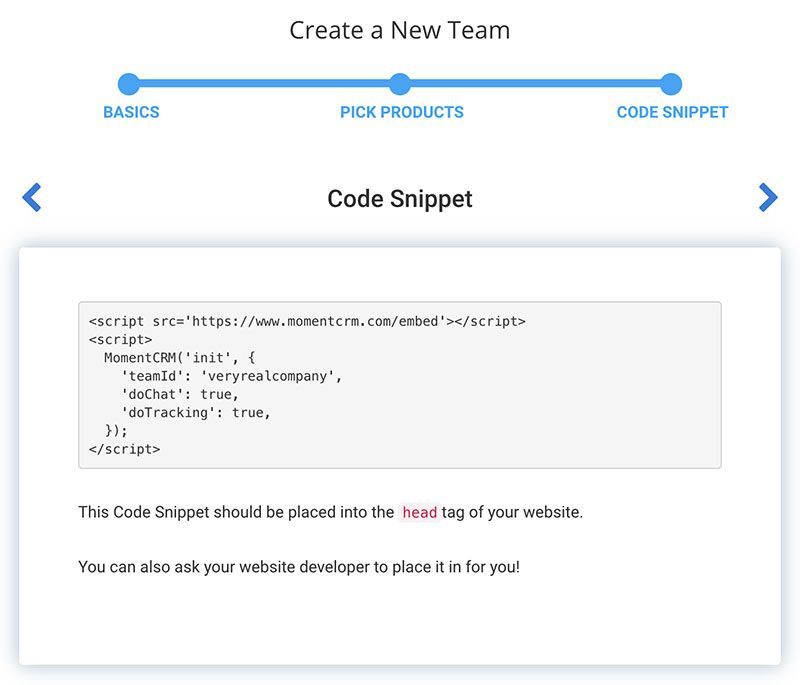
Lastly, Moment will provide you with a code snippet to add to your site and enable live chat.
Let’s review how to do this with and without the use of plugins.
Installing via Plugin
Installing the code via a plugin is quite easy. First, you’ll need to install a plugin to edit the content of the site’s <head> tag.
There are several options for this, have a look at a few plugins and their reviews to choose one. After this, install the plugin to your site and access its settings.
Here, make sure to copy/paste the snippet from Moment and submit your changes. You should now see the Moment live chat bubble on your website.
Installing without a Plugin
There’s a few ways to edit the header.php file from your website without using a plugin. You might want to do this to cut down on the number of plugins running on your site.
Since you will be directly editing the header.php file on your website, we recommend you back up your files and maybe go as far as creating a child theme of your current theme for further editing.
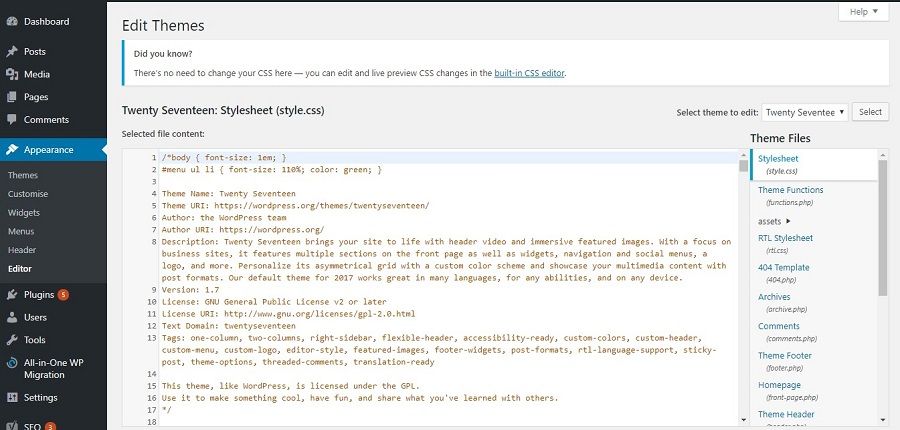
In order to edit the header.php file, you can use the built-in theme editor on WordPress. Do this by clicking on the Appearance tab on the left sidebar and then on Editor. Here you can find the header.php file on the left sidebar and edit the <head> tag directly.
Another alternative is editing the header.php file through FTP. This might be a bit more complex for most people, but through this method, you will have a chance to backup your header.php file before making any changes to your site.
Getting Started with Live Chat
You are now ready to provide live chat support on your website. However, you might have no idea how to actually provide customer support via live chat.
Luckily, we’ve written an in-depth guide on how to provide live chat support, from preparing your team to best practices.
If you run into any issues, feel free to chat with us for support.
Happy Chatting! 💬