How to Add a Free Live Chat to a Squarespace Website

Need to add a live chat feature to your Squarespace website? Great, you’ve come to the right place.
We know that adding a live chat to your website might seem like a daunting task. However, adding this feature is incredibly easy.
But adding a live chat to your Squarespace website can be done in 3 simple steps:
- Create a new team on Moment
- Create a Free Moment Account and Verify Your Email
- Copy and Paste the Code Snippet in the <head> Tag of Your Website
Let’s break it all down. Here’s how to add a live chat to your Squarespace website.
Choosing a Live Chat Tool
Now, the first step in adding a live chat to your Squarespace website is choosing a live chat tool.
Ideally, before choosing a tool, you will identify and review your business needs when it comes to a live chat service. Do you require any specific features or integrations?
When it comes to selecting a live chat tool for your website, we obviously recommend Moment, our fully-featured CRM suite with Live Chat and Session Recording integrations.
The best part? Moment’s live chat features are included in our free plan.
For the rest of this tutorial, we will go over the steps of adding a live chat to your Squarespace site using Moment.
Adding a live chat to your Squarespace website in 3 simple steps
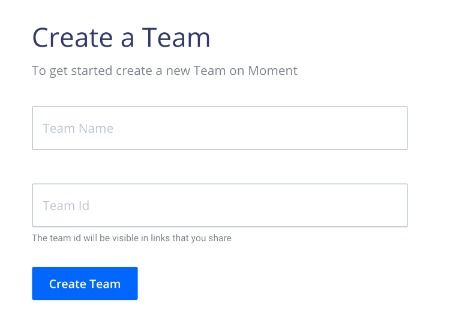
1. Create a New Team on Moment
First off, you will need to create an account with your live chat platform of choice.
In Moment, creating an account is free and does not require a credit card or method of payment.
To start you'll need to create a new team on Moment, we recommend using your company's name.
2. Create a Free Moment Account and Verify Your Email
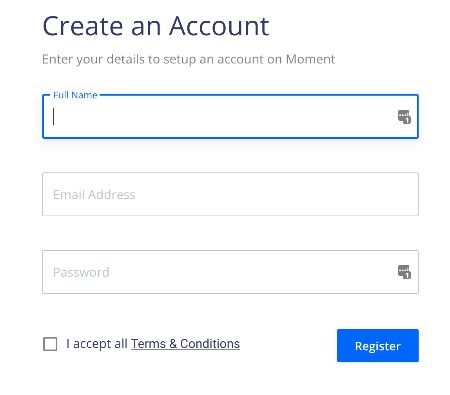
You'll be taken to this page where you will need to create an account and confirm your email address.
3. Copy and Paste the Code Snippet in the <head> Tag of Your Website
After setting up your team, you'll be taken to this page
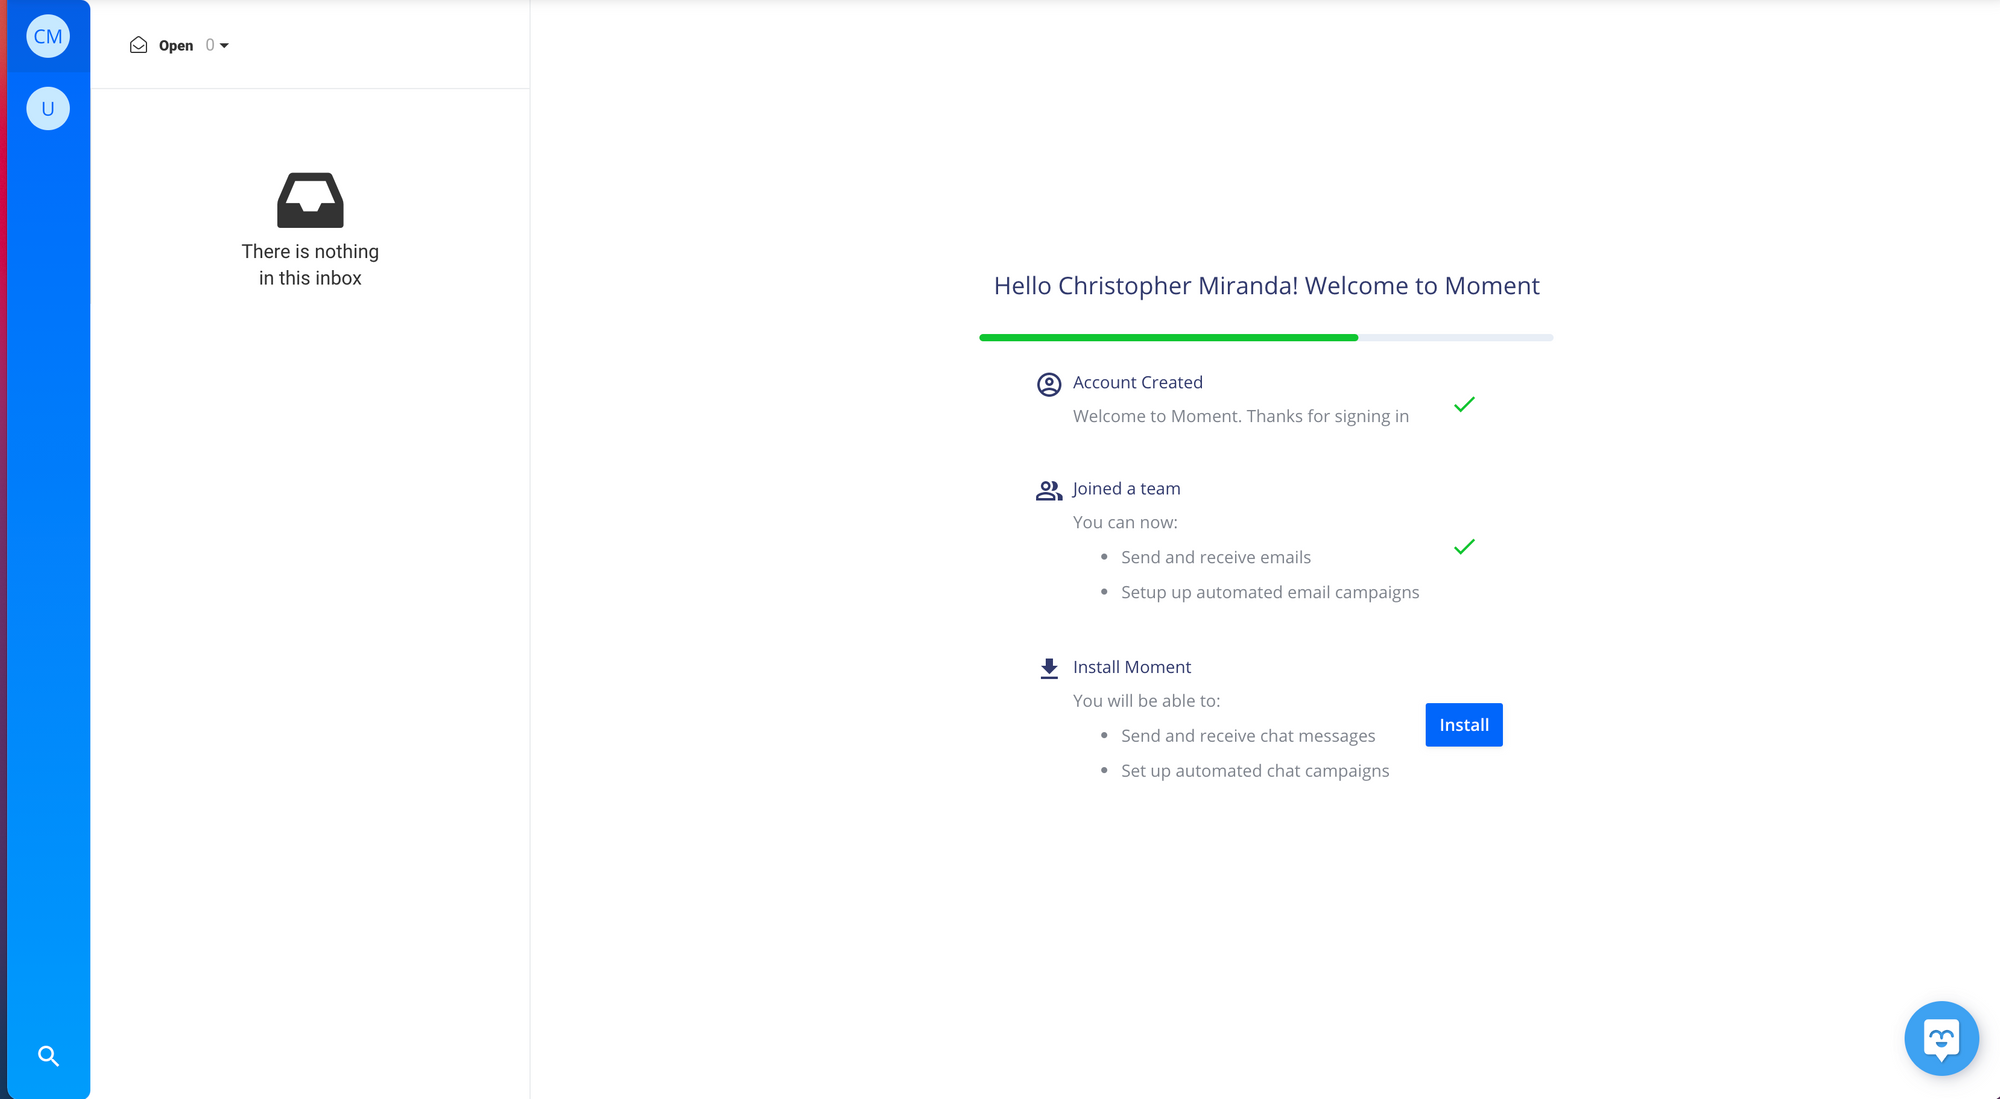
Click on the blue install button, Moment will provide you with a code snippet to install on your site. If you do not know how to do this, you can forward it to your webmaster. Simply copy and paste this code into your <head> tag
You will also be given the option to enable Moment Tracking. This feature records your users’ sessions on your site, allowing you to see the issues they have experienced while assisting them. This feature is fully optional.
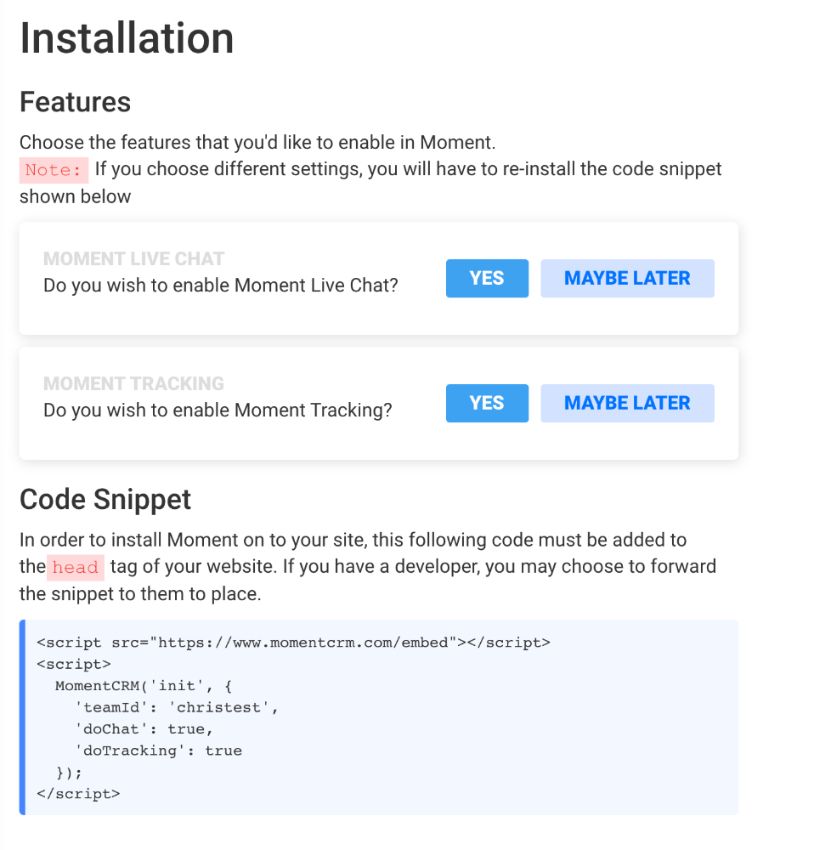
Once the snippet is installed on the site, your chat pop-up window will appear at the bottom of every page.
Adding the code snippet to your Squarespace website
Once you’ve selected your features, Moment will provide you with a code snippet to copy and paste on your Squarespace site.
The next following steps are custom for Squarespace websites. If you have a different website builder, you can check out our other guides to set up a live chat.
To do this, you will use the Code Injection feature on Squarespace.
- Once you’re logged into your Squarespace dashboard, click on the website you want to add the live chat to.
- Click on settings > Advanced > Code Injection
- Paste the Moment snippet under the Header section and then hit Save.
And that’s it! You should now see Moment’s chat bubble across your Squaresapce website and you’ll be ready to support your users via live chat.
If you run into any issues with Squarespace’s Code Injection, check out their guide on how to use this feature.
Customizing Your Live Chat
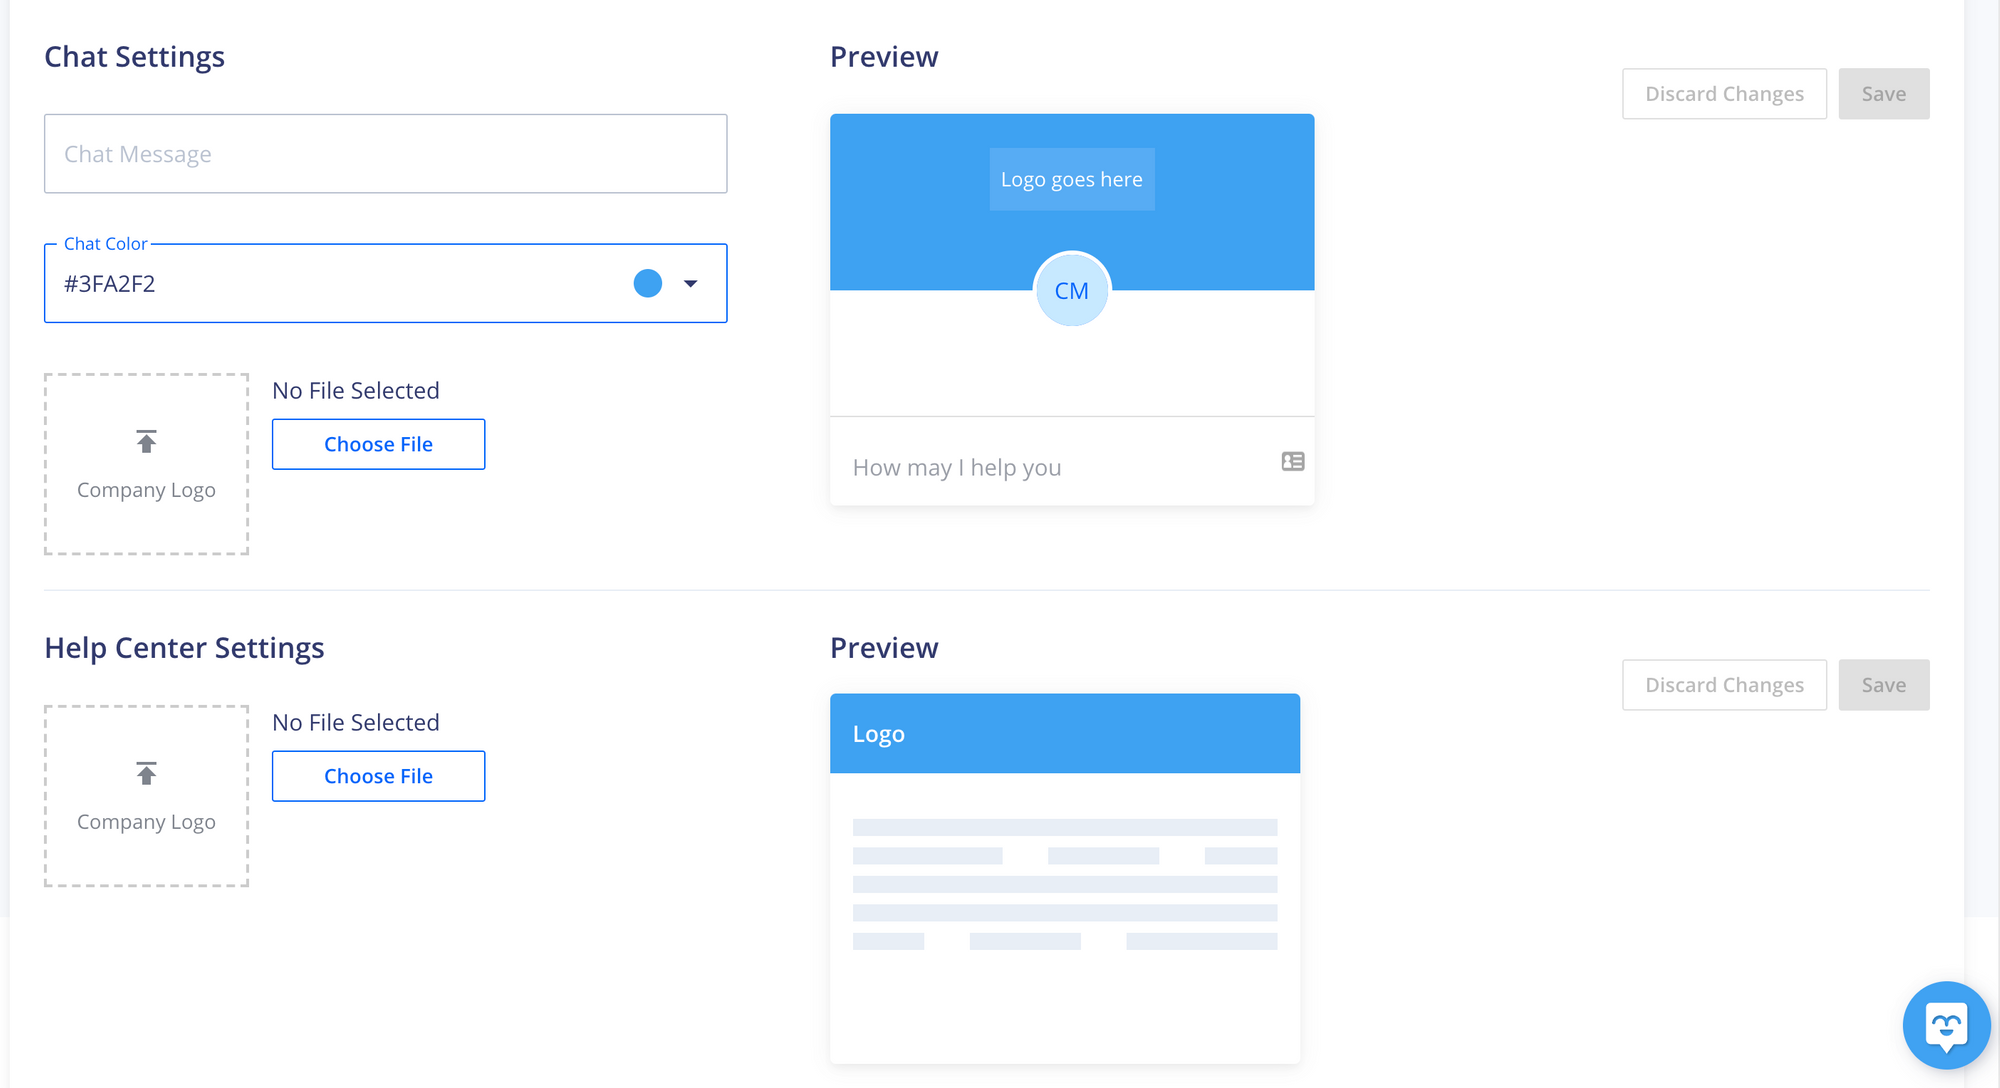
Now that you have your live chat installed on your website, You can customize it!
In the drop-down menu on the left top corner, Under General, click on Team Settings
You'll be taken to the General Settings Tab. On this page, you'll be able to change your team name, chat message, colour and insert your company logo!
Adding Team Members To Your Live Chat
If you have other people in your company helping with customer support, now it’s time to add them as team members.
In the Moment dashboard, click on the menu in the top-left of the screen and under General click on Team Settings, then on "Members"
Then click on "Add Member" on the top left corner

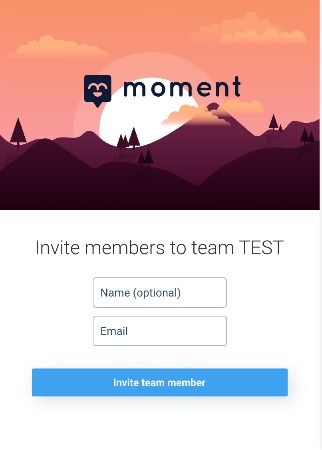
Here you will be able to set up their account. Team members will then receive an email invite to join the team and start providing support.
Why you should add a live chat to your website
If you’re still sitting on the fence about live chat technology, we have to emphasize why you should add a live chat to your website and how it can help your business.
We like to start with this important statement: If you don’t have a live chat on your website, you might be leaving money on the table.
After all, live chat technology will improve your customer service efforts, which in turn can increase your revenue.
Lastly, there are several other benefits such as live chat being a more inexpensive solution for customer service when compared to phone and email. If you’re still unconvinced, you can read our guide on why you should add a live chat to your website.
Getting Started with Live Chat
So you are now all set up with a live chat on your Squarespace website.
However, you might feel as you don’t know where to start when it comes to actually providing customer support via chat.
Luckily, we have put together an in-depth guide on how to provide customer support via live chat with tips and best practices.
Happy Chatting! 💬
